Change Screenshot Location: We tend to take a lot of screenshots because it’s a pretty easy way to share something from your computer or smartphone. The ability to take screenshots is now available on almost all OS platforms, and Windows is no exception. There are various native commands like Win + PrtScn, Alt + PrtScn, etc. which allow you to easily take screenshots on a PC. If you’re new to Windows, you’re probably wondering where the screenshots go. OK, the screenshots taken in Windows are stored in the Pictures folder, which is a clear position but what if you don’t want to mess up the picture folder with the screenshot.
The good news is, you can change the screenshot folder in Windows 10, 8.1, or 8, very easily. Therefore, without further ado, here are the steps to change the screenshot location in Windows 10:
Note:: We have used this method on Windows 10 PCs but it should work fine on Windows 8 and 8.1, 10 powered systems.
D. First, just Create a folder Where you want to save your screenshots in the future.
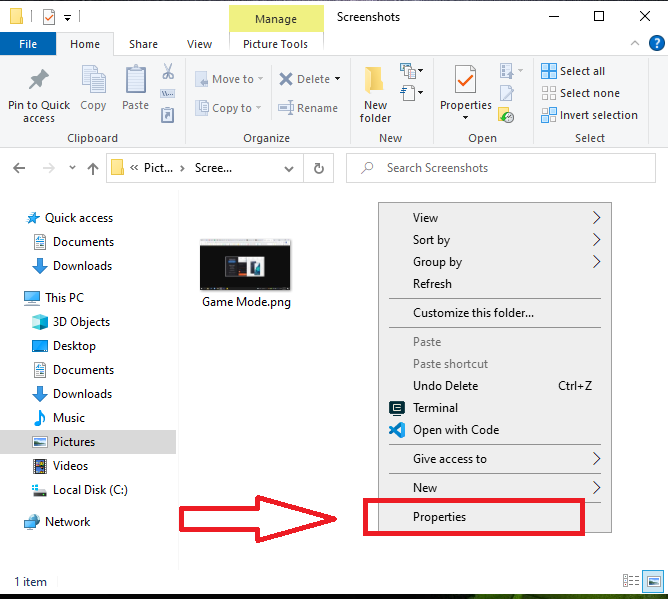
2. Then, move on to the Photo folder On your PC and open the “Screenshot” Folder. Here, right-click on an empty space and click”Features“.
3. In “Screenshot features“Go to the dialog box”LocationClick on the “Tab. Here, “Move” Button.

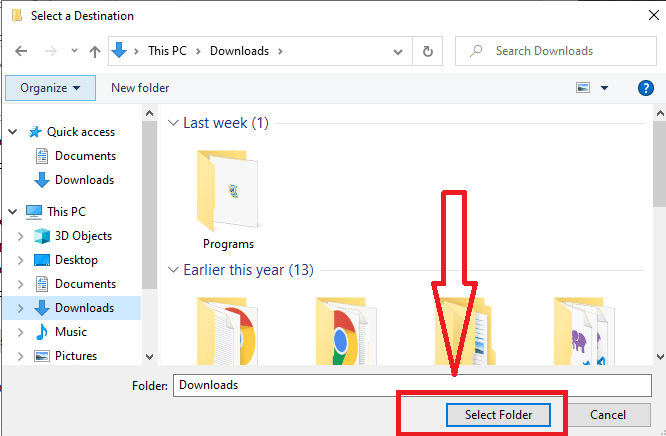
4. Then, Select the folder you created To save your screenshot. Once done, click “OK”.
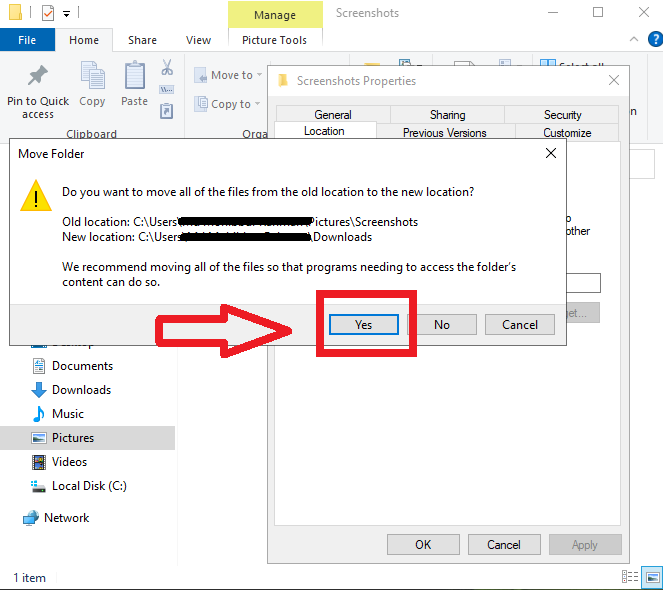
5. Once done, Windows will ask you to remove the file From the old screenshot folder to the new one. If you want the old screenshot, click “Yes”.
6. Now, the screenshots you took will be saved in the new screenshot location that you set up. You can always set it to the default position with “Default reset“Options.
Easily change the screenshot folder
Well, it was easy, wasn’t it? This was a simple step to change the screenshot location in Windows. You can now make sure that the screenshot folder does not clutter up your picture folder. The steps are quite simple but if you encounter any roadblocks let us know in the comments section and we’ll be happy to help.