Windows Defender is a solid first-party antivirus in Windows 10. I’m glad that finally, Microsoft has a feature-rich and Secure antivirus for Windows 10 That is not a resource hog it comes with many features that can be helpful for users. One of the best features of Windows Defender (now known as Windows Security) is that you can add exclusions to files and folders, and antivirus will not scan those items. That’s awesome, isn’t it? It will be significant to improve the performance of your PC And free up resources for other work. So without further ado, let’s go ahead and learn how to Exclude Files and Folders from Windows Defender.
Exclude files and folders from Windows Defender
1. Press and type the Windows key once on your keyboard and Security Now, open Windows Security from the results above.

2. Here, “Virus and threat protection Click the “Tabs” and “Manage Settings”.
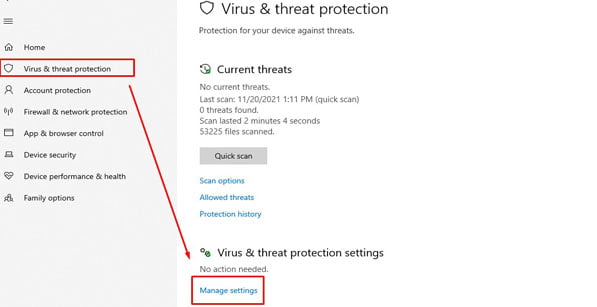
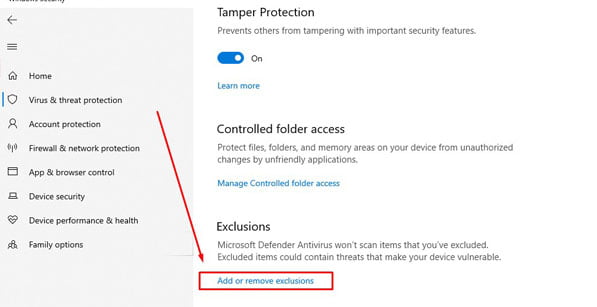
3. Now, scroll down and you will get a section called “Exclusion” From here, you can add any files or folders, and Windows Defender will exclude them from scanning. To proceed, click “Add or Remove Exclusions”.
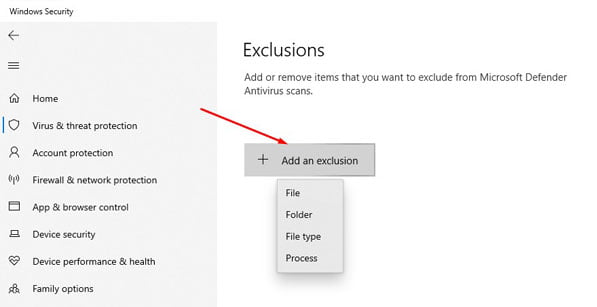
4. Just click on “Add an exclusion” And choose what you want to exclude from Windows Defender.
- File: This allows you to delete a specific file, be it a document file or a development tool.
- Folder: You can add an entire folder and it will not be scanned.
- File type: Then there is “File Type” where you can specify file extensions like EXE or PDF and those file types will not be scanned.
- Process: Finally, there are “processes” where you can add background tasks and processes and they will not be scanned.
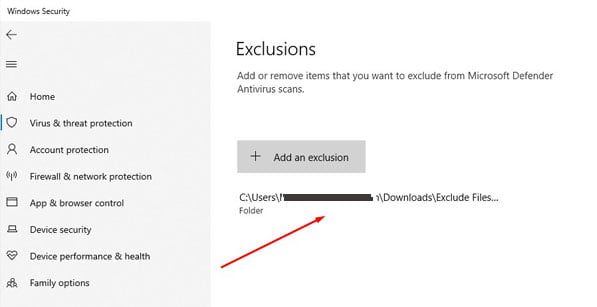
5. Here, for example, I Select a folder And it will not be scanned from Windows Defender. Once you do this, Windows will ask you to confirm your action. Click “Yes”.
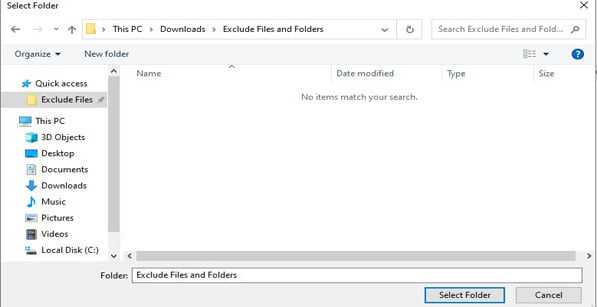
6. Now, you have successfully deleted a folder from Windows Defender. From now on, the folder will not be scanned By Windows Defender.
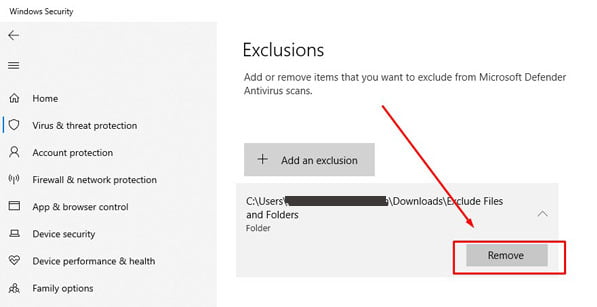
7. If you want to remove the exclusion, just click on the entry and click on “Removal That’s it.
Speed up your PC with Windows Defender Exclusion
So this way you can add exclusions to Windows Defender and make your PC faster to use. As we all know, Windows scans files, folders, and various other things in the background which slows down the PC. Windows Defender can slow down performance if you’re working on a large document or compiling code.
So go ahead and add exclusions as you wish. In case, you want Permanently disable Windows Defender Then follow our deep guidelines. Also, for more of this kind Windows 10 tips and tricks, Go through our linked guide.