Remember that time when the demand for screen savers was much higher? If you are unfamiliar with these, I would tell you that they were widely used to protect cathode-ray tube (CRT) monitors from image burn-in; If you want to add a nice visual touch to your PC, we will show you how to set up a screensaver in Windows 10 as well as the ten best screensavers that you can use in 2019.
Easily set up screensavers in Windows 10
In the first half, we’ll show you how to set up and customize your screensaver in Windows 10.
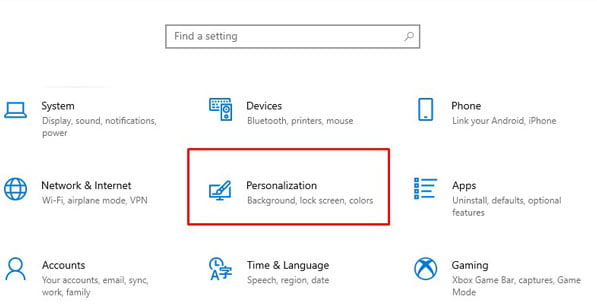
- To proceed, Go to settings and choose “Personalization” or, right-click on your desktop and choose “Personalization” On the menu.
Note: Periodically, you can search “Screen Saver” In the taskbar search box and select “Change screen saver” Quickly dive into settings. Or just click Click on the “Start Menu” and the Settings icon -> Lock Screen.
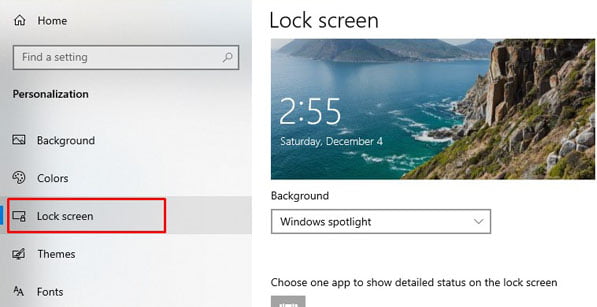
2. Now, click “Lock screen”.
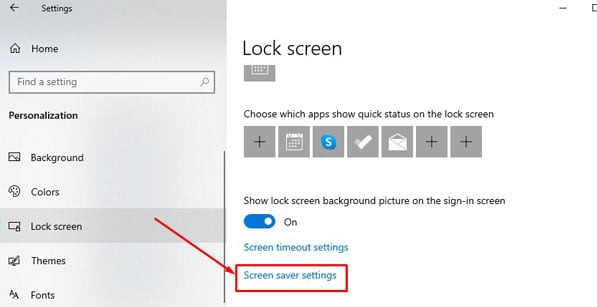
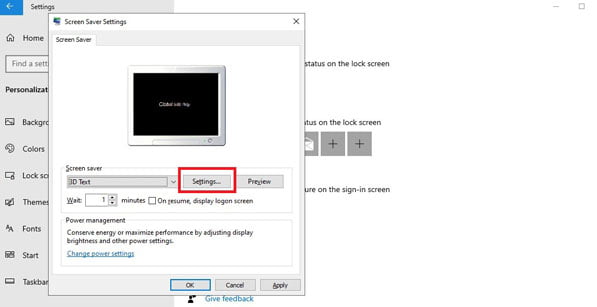
3. Next, click “Screen Saver Settings”.
Next Level
4. Under the Screen Saver section, click on the drop-down menu and select the screen saver of your choice. Windows 10 comes with six screen savers: 3D text, blank, bubble, mysterious, photo, ribbon. To find out which one might go well with your taste, simply select a screensaver and then click Preview.

5. After selecting a desired Windows 10 screen saver, click “Settings” To customize it.
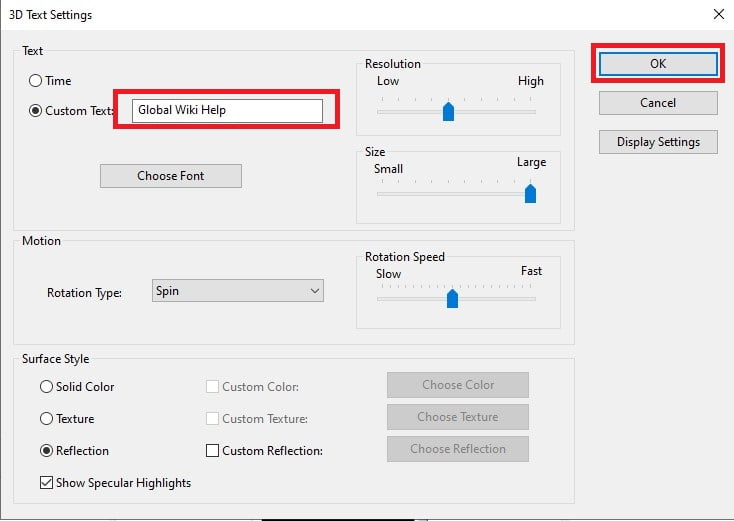
One thing to note is that The customization options in the settings depend on the screen saver you choose. Also, not all screen savers have their own settings. Once you have fine-tuned the screen saver settings, click “OK”. In this tutorial, I have chosen 3D text. It offers many customization options such as resolution, size, selection of rotation type and much more.
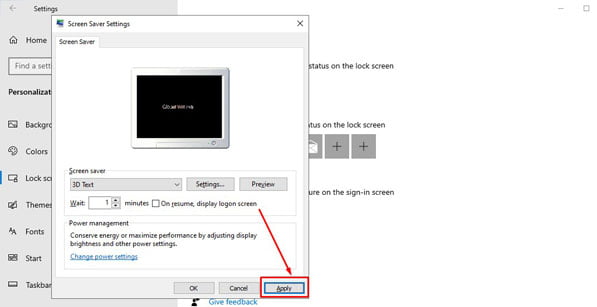
6. Next, you can use “Wait “option Choose the number of minutes after which the screen saver will turn on. Check the box on the left if you want to lock your PC automatically when screen saver is turned on. When you customize the settings, click “Apply”.
7. Finally, Click “OK” And you’re ready to go!
Going forward, Windows 10 will launch a screen saver based on the settings you apply. If you ever change it, go back to the same settings and make the desired changes described above.
Create a screensaver shortcut in Windows 10
If you are interested in screensavers and often need to change its settings. This will allow you to dive into the settings with a single click.
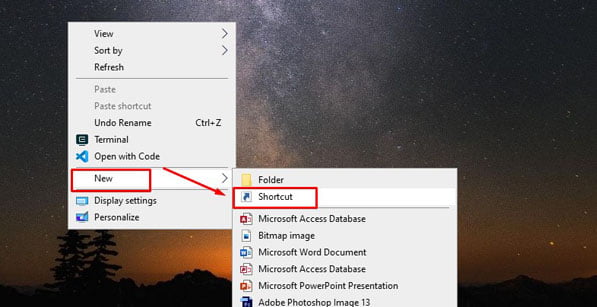
- Only, Right-click on the desktop And select New -> Shortcuts.
2. Now, type the location of the item: control desk.cpl,,@screensaver
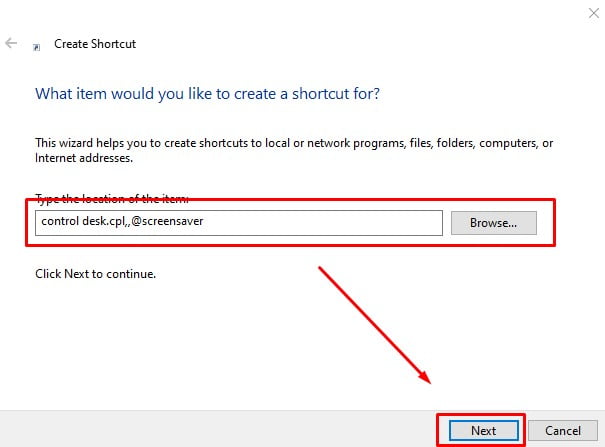
And then, click “Next”.
3. Next, Give this shortcut a cool name and click “Finish”.
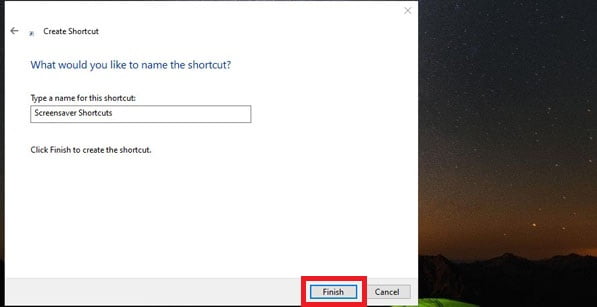
Now, a shortcut will be created and saved on the desktop. Whenever you want to access screensaver settings, just click on it.