Although Windows 10 comes with a native internet bandwidth manager, it does not come with an internet speed tracker. This means there is no way to verify how much internet your system is using in real-time. That’s where internet speed meter tools can help you. These tools can show you the current Internet upload and download speeds on your Windows machine. This information is quite convenient. This can help you determine when your device is using the expected Internet bandwidth. Internet speed tracking can help you track connection issues on your network. So, in this article, we are going to help you monitor real-time internet speed by Show Internet Speed Meter in the taskbar on your Windows machine.
Show Internet Speed Meter in Windows taskbar
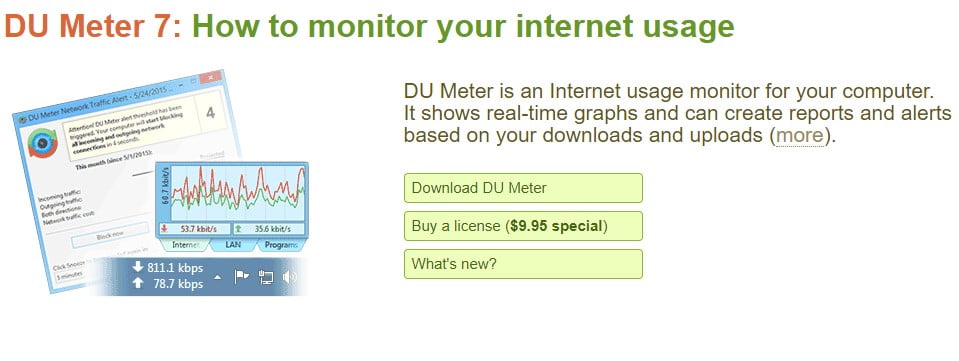
Since Windows does not support internet speed tracking, we will use a third-party app to do this. There is both free and paid software available in the market that does this. We’ve tested several Internet Speed Meter tools for Windows, and the best one we’ve found and recommended is the DU Meter. You can download the software by clicking here. It is You will need to purchase a license after free download and use it for a 30 day trial period. Its regular price is around 30 30 but you can usually get it for around 10 10 discount.
Once you’ve downloaded the DU Meter app, follow the steps to show Internet speed in the Windows Taskbar.
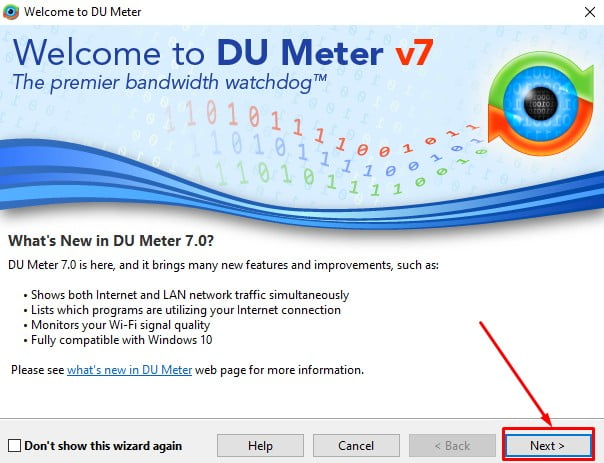
1. First, double-click the installer file to install the app. Once installed, it will open as shown in the attached image below.
Click the “Next” button to proceed.
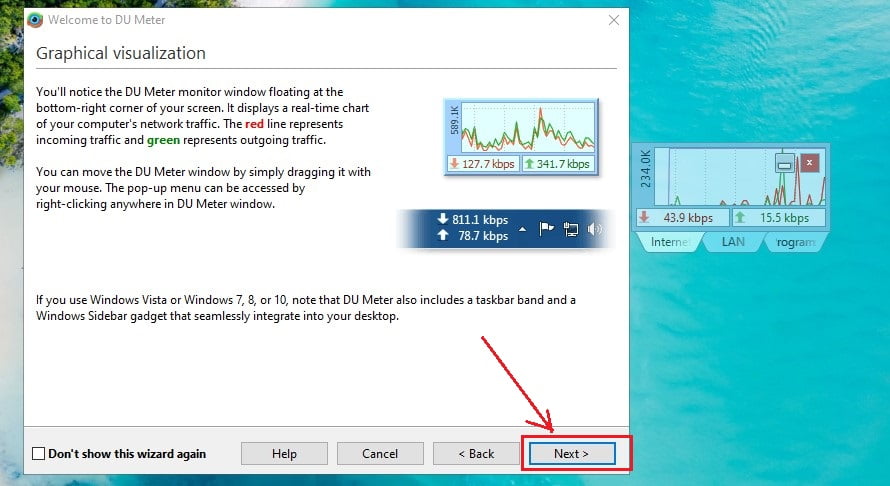
2. On this page, the DU meter will give you a brief explanation of its interface and show you what the software looks like. The key point here is that the Taskbar feature is supported on Windows Vista, Windows 7, Windows 8, and Windows 10. That means it will work for 99% of you. If you’re still on Windows XP for some reason, the DU meter will work but it will only show floating windows. Anyway, click “Next” to proceed.
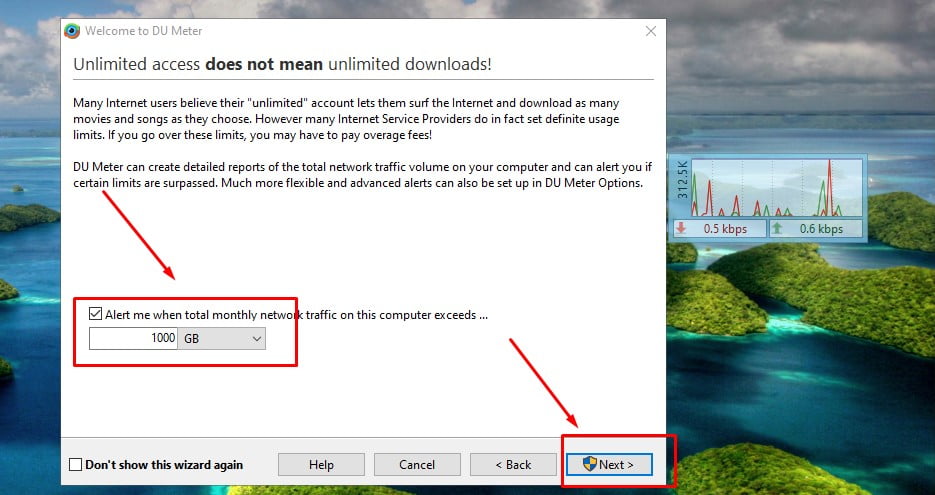
3. On this page, You can set a limit for your monthly usage. Once your computer exceeds that limit, the DU meter will notify you. It will also send you advanced alerts so that you know when you are about to cross the line. You can enter the limit here or configure it later in the app settings. Click “Next” to proceed.
4. This page is not suitable for most users. For users who want to use DU meters on multiple Windows PCs and create a growing report, you can follow the same steps. Click “Skip” to proceed.

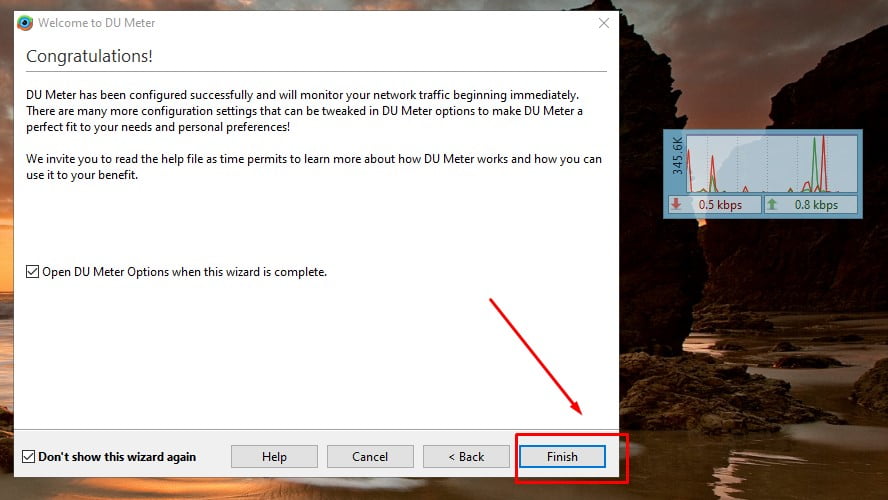
5. Now, click on the “Finish” button to finish the setup.
6. Once the setup process is complete, You will see a popup asking you to enable the DU meter toolbar in the taskbar. Click “Yes” to allow.

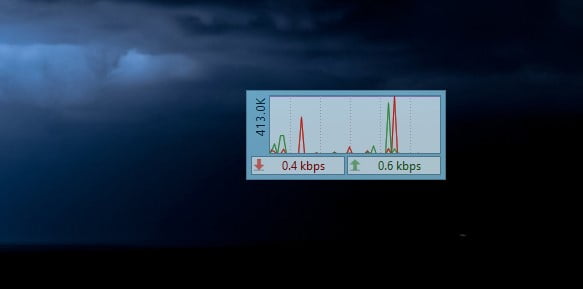
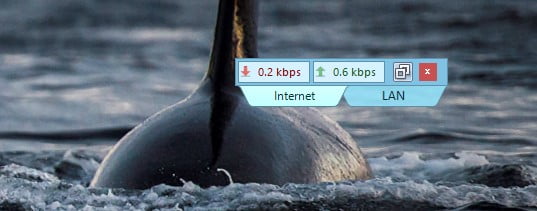
7. As you can see, the DU meter is now tracking my internet and The Windows taskbar shows me the speed of the Internet. You will also see a floating graph bar that shows some additional information.
8. Well, you can click on the window to reveal different options.
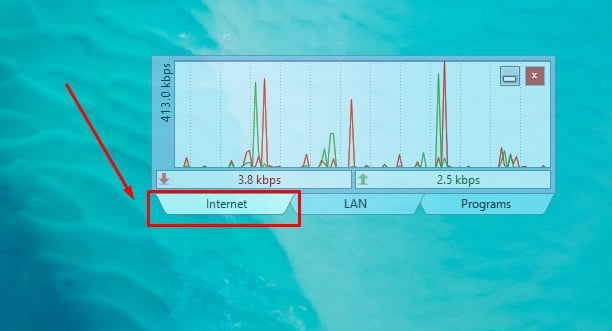
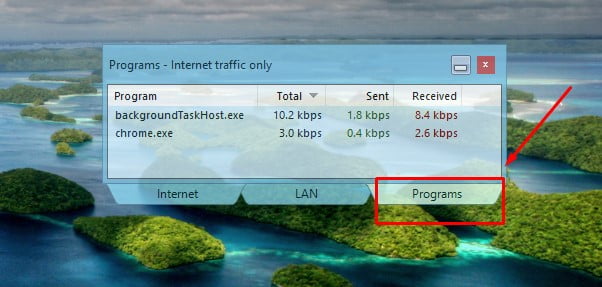
9. Of the following three menus (Network, LAN, and Programs), the most important is the “Programs” menu as Show a list of apps that have accessed the Internet With the amount of bandwidth they are using. This is a great way to quickly find the criminal app or software that is gathering all the data.
10. There is also a minimize and close button at the top. The “Minimize” button shrinks the window at the top of your screen Where it is visible above what you do. This is a great way to monitor your internet speed without looking at the taskbar.
11. If you don’t like it, you can click the “Close” button which closes the floating window. You can open it again by opening the “System Tray” And clicking on the DU Meter app icon.
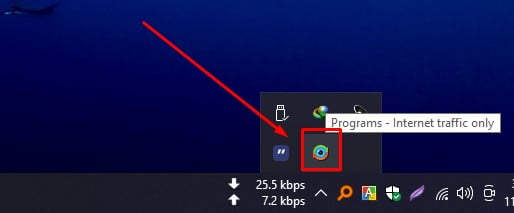
12. While you are here, you can right-click the system tray icon to reveal more options Including reports, user options, administrator options, and more.
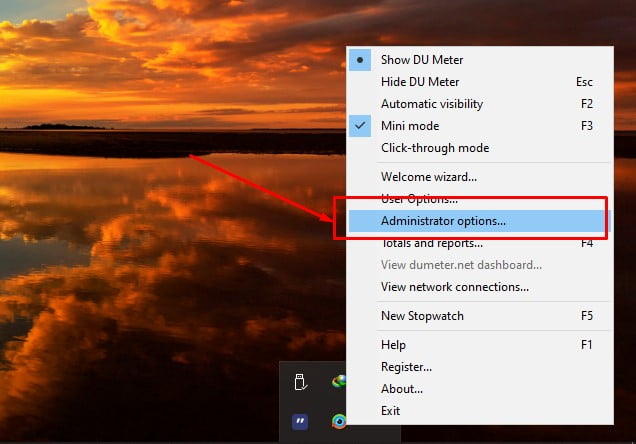
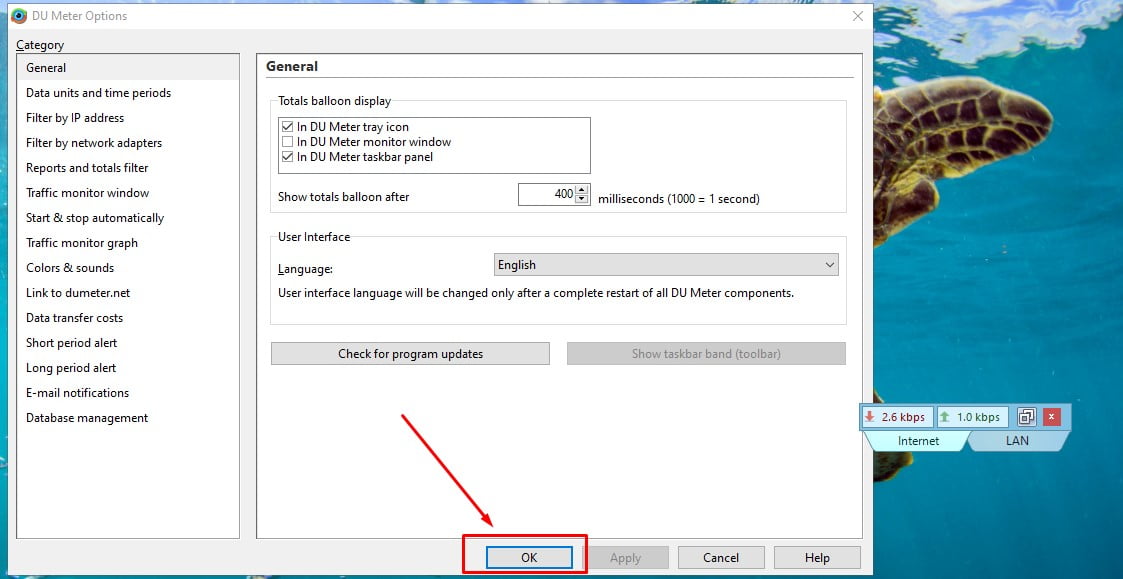
13. To access all the settings and configure the software, click on “Admin Options …”. Here, you will find all the configuration tools. Similarly, whenever you need to dive deeper into your internet speed tracking report, click on the “Totals and Reports” option.
Show Internet Speed Meter in Windows taskbar
As mentioned above, DU Meter works on Windows Vista and above. If you have one For PCs running Windows XP or Windows Server 3, you should check out NetSpeedMonitor. In addition to the versions of Windows mentioned above, the app also works with Windows Vista and Windows 7. And since it’s a free tool it’s a great option for the DU meters.
Work Netspeed Monitor on Windows 8 and Windows 10
If you want to use NetSpeedMonitor on Windows 8 and Windows 10 devices, you can. While it won’t give in-depth information as a DU meter, it can be used for free which is a big plus. So, here’s how you can enable NetspeedMonitor on Windows 8 and Windows 10 machines to display free internet speeds in the taskbar.
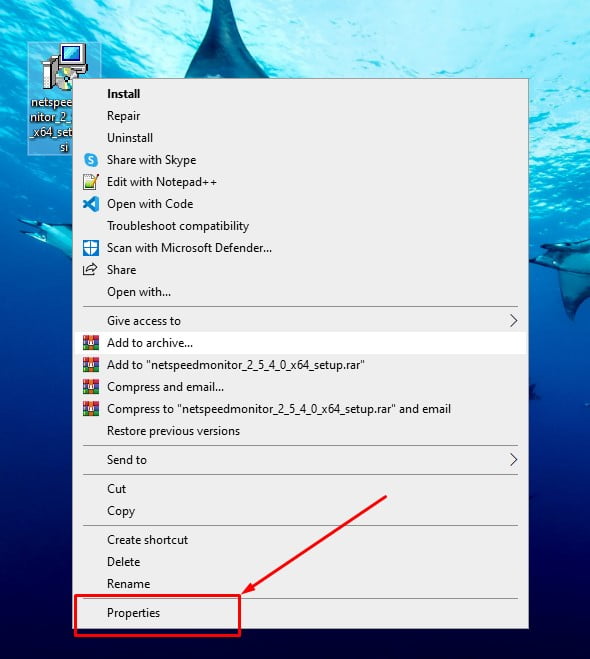
1. Right-click on the installer file and then select properties.
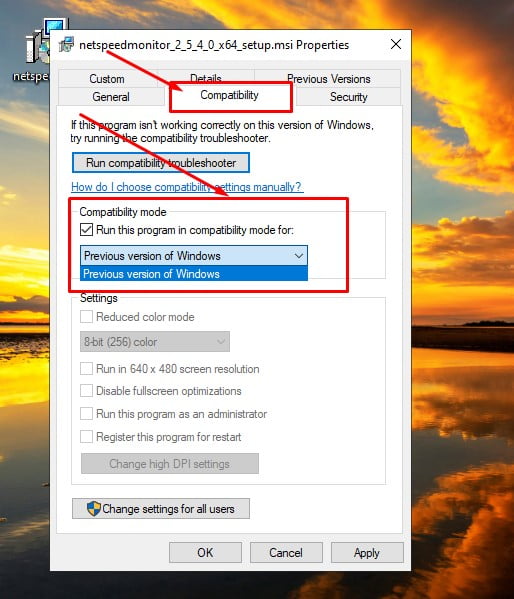
2. Here, select “Adjustment” and Enable the checkbox next to “Run this program in sync mode.” Options (marked in the image below). Click “Apply” and then install this application like any other regular Windows app.
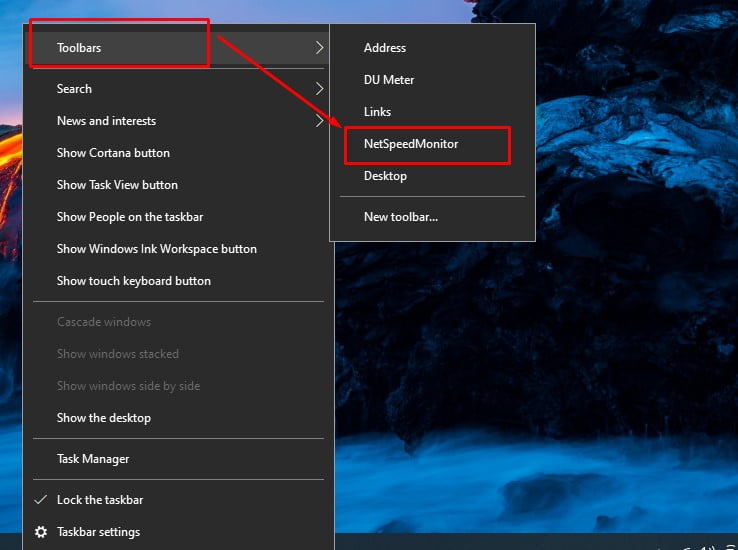
3. After you install the app, you will not see any changes on your computer. Because you have to enable it first. To do it, Right-click anywhere in the Windows taskbar and then go to the toolbar -> Netspeed Monitor.
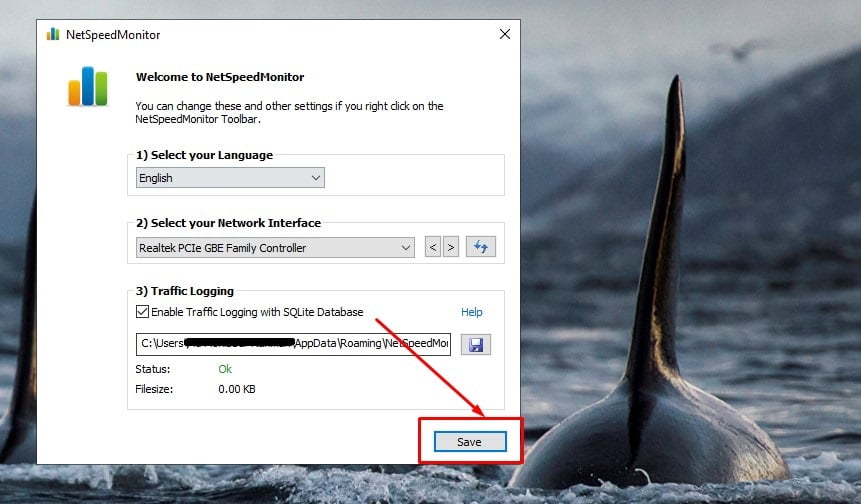
4. Finally, click the “Save” button.
5. Now, since this tool is not intended to work with Windows 8 and Windows 10 devices, For some users the internet meter may be stuck in the void. On my Windows 10 device, it was stuck in the air for me, as shown in the picture below. But don’t worry, we have a solution.
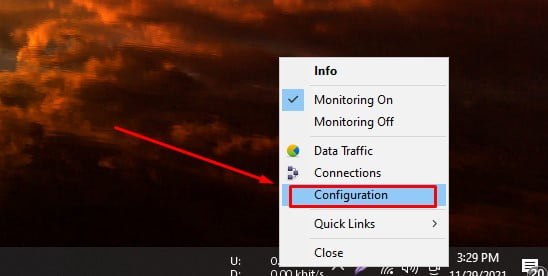
6. Right-click on the NetSpeedMonitor reading (which is stuck in the air) and Click on “Configuration”.
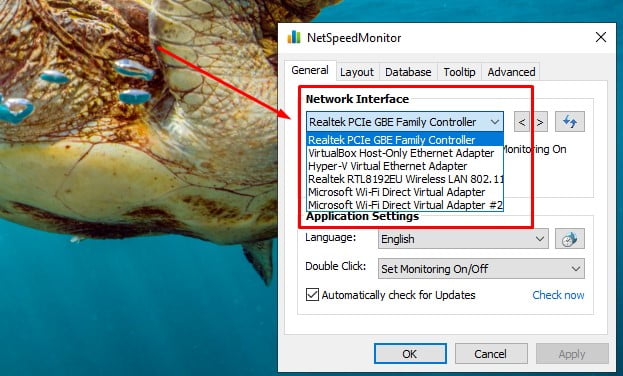
7. Click on the drop-down menu under “Network Interface” and select the name of your WiFi adapter and click Apply. If you don’t know your machine’s WiFi adapter, just pick one and apply it and repeat the process until it starts working.
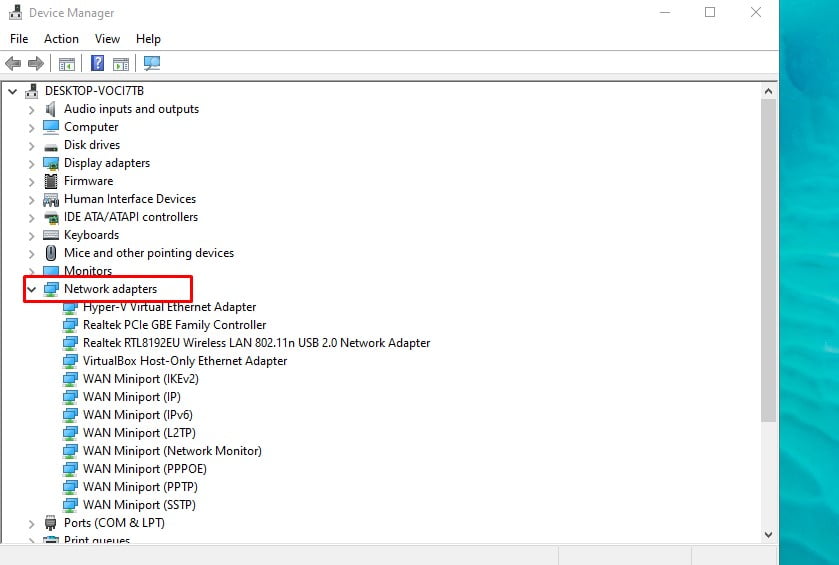
8. However, you can find the WiFi adapter in your machine Open “Device Manager” and expand the “Network Adapter” menu.
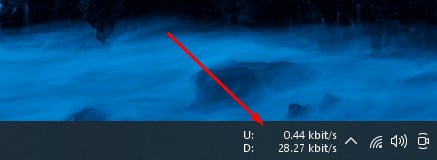
9. Now, it should start tracking your internet speed. It started working for me as you can see in the picture below.
Keep track of Internet usage on your Windows machine
I hope you followed the tutorial and succeeded in turning on the internet speed meter on your Windows machine. If you have any problem following the tutorial, let us know in the comments section below and we will help you. As far as any software you use, if you think long-term, DU meter is the option that you have to go with. It is actively developed and provides many more features. However, if you just want a simple internet speed meter and don’t want to pay anything for it, NetSpeedMonitor is the option for you. Check them out and let us know which one you went with.