Windows 10 provides multitasking support for Windows with multiple notable features, including split-screen views for multiple applications. Many of us use the split-screen feature on a daily basis without exploring its true potential. So today, we will show you how you can use all aspects of the Split Screen feature (Snap Assist). Windows 10. We’ll also look at some apps to split the screen for advanced multitasking on your Windows 10 computer.
Use the split-screen in Windows 10 to run multiple apps at once
In this article, we will show you different ways that you can split the screen in Windows 10 to take full advantage of this built-in feature. We’ll also tell you about third-party utilities and a Microsoft app that gives you extra features to help you with multitasking like Pro. So without further ado, let’s take a look at all the different ways that multitasking can be done using the split-screen feature in Windows 10.
1. Using Snap Assist for split-screen multitasking in Windows 10
Windows is known as a built-in feature Snap Assist Which helps users organize the space on their screen more efficiently. The feature enables users to snap windows quickly or inside corners without having to manually resize them with the mouse or keyboard. First introduced in Windows, Snap Assist in Windows 10 includes more functionality, including the ability to snap four windows per monitor.
Snap Assist is enabled by default, but you can disable it or tweak the features manually depending on your usage. Here’s how you can access Snap Assist settings in Windows 10:
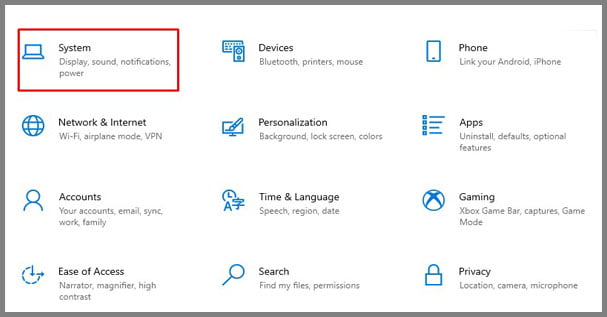
- Open Settings (Press Windows key + I together) and click Method.
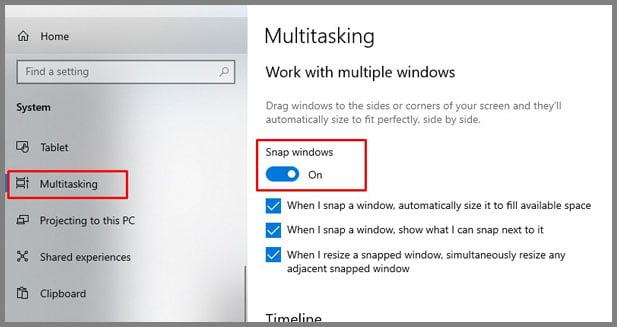
- In the left pane, click ‘Multitasking’. Now make sure that the toggle under ‘Snap Windows’ is turned on. The other three options below the toggle should also be ‘turned on’ for the feature to work perfectly.
2. Snap two windows side-by-side
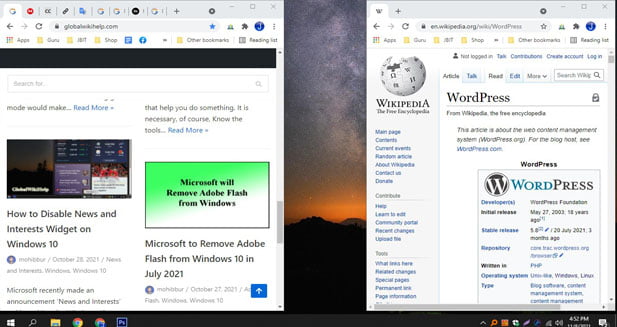
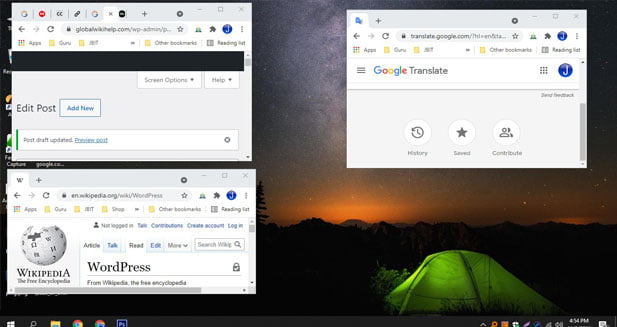
Once you make sure Snap Assist is turned on, you can snap up to four windows on any part of the screen. To do this, first select the window you want to use in split-screen mode. Now Drag the window to the left or right edge of your screen, Depending on where you want to snap. A clear outline indicates where the window will snap once dropped. You can see it in action here:
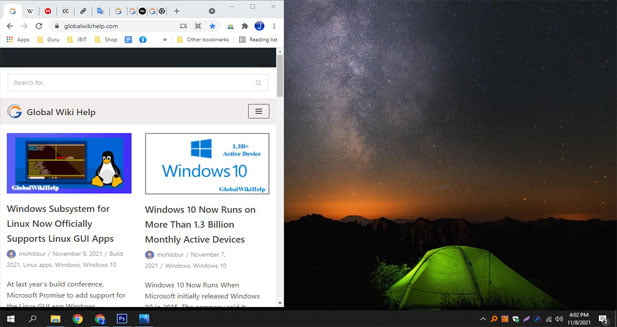
Once you snap the first window to one side, all other open windows will appear as thumbnails in the other half of the screen. Click the thumbnail to snap that window in the empty half of your screen. Remember that once you snap two windows side by side, you can Resize them together by drawing dividing lines In the window using your mouse.
3. Snap more than two windows
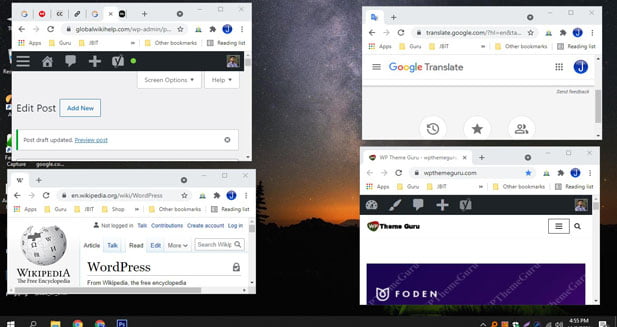
To snap more than two windows, you can drag a window to any corner of your screen. You’ll see a transparent outline again, and the window will snap to that corner. The other three corners of your monitor will have the option to snap three more windows. But in Windows 10 it is possible to use only three windows in split screen mode as we see in the screenshot below.
Overall, Snap Assist will allow you to snap up to four windows on your screen. This can come in handy when investing, watching multiple videos, and many other situations to keep track of stocks.
4. Use keyboard shortcuts to snap Windows
Microsoft also offers Keyboard shortcuts in Windows 10 To enable split-screen mode. To do this, you must first select the window that you want to snap and Windows + left / right arrow key press To snap windows on one side of the screen. Then you can too Press the Windows key + up / down arrow key To move the window to one corner of the screen. You can remove it using the Windows + arrow keys.
In my experience, keyboard shortcuts act as ads. However, they are not as intuitive as drag-and-drop functionality using the mouse and are not easy to use. However, it does give you the option to snap Windows without using your mouse, which may be helpful for some users.
5. Using a third-party app to enable split-screen in Windows 10
While Microsoft offers a native split-screen feature in Windows 10, some third-party apps take the functionality to a whole new level. We offer the free app, which AquaSnap recommends Several split-screen features include window docking, snapping, stretching, and shaking. It supports keyboard shortcuts and helps users move a mouse over a window.
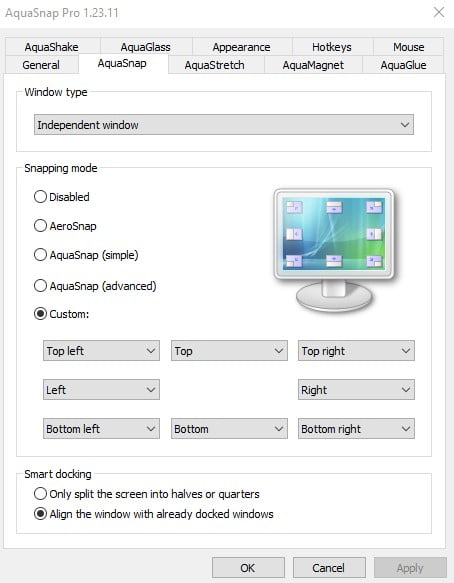
AquaSnap has a premium, paid version that offers more functionality. These include mouse shortcuts, window tiling, the ability to move windows together, minimize windows in a tray. Most importantly for gamers and power users, the paid version offers multi-monitor support. You can check AquaSnap on developer Nurgo software Official website And see which version is most suitable for your needs.
Use split-screen mode in Windows 10 Multitask like a Pro
Multitasking is a breeze with a split-screen view in Windows 10, as it enables you to use multiple programs at once. Hopefully, this tutorial will help you to make better use of the split-screen function in Windows 10. How can you learn Password protected files and folders in Windows 10, How Find the saved Wi-Fi password, And how to Disable the lock screen In Windows 10. Also, learn to create a system restore point And Troubleshoot network connection In Windows 10.